Use this chart for
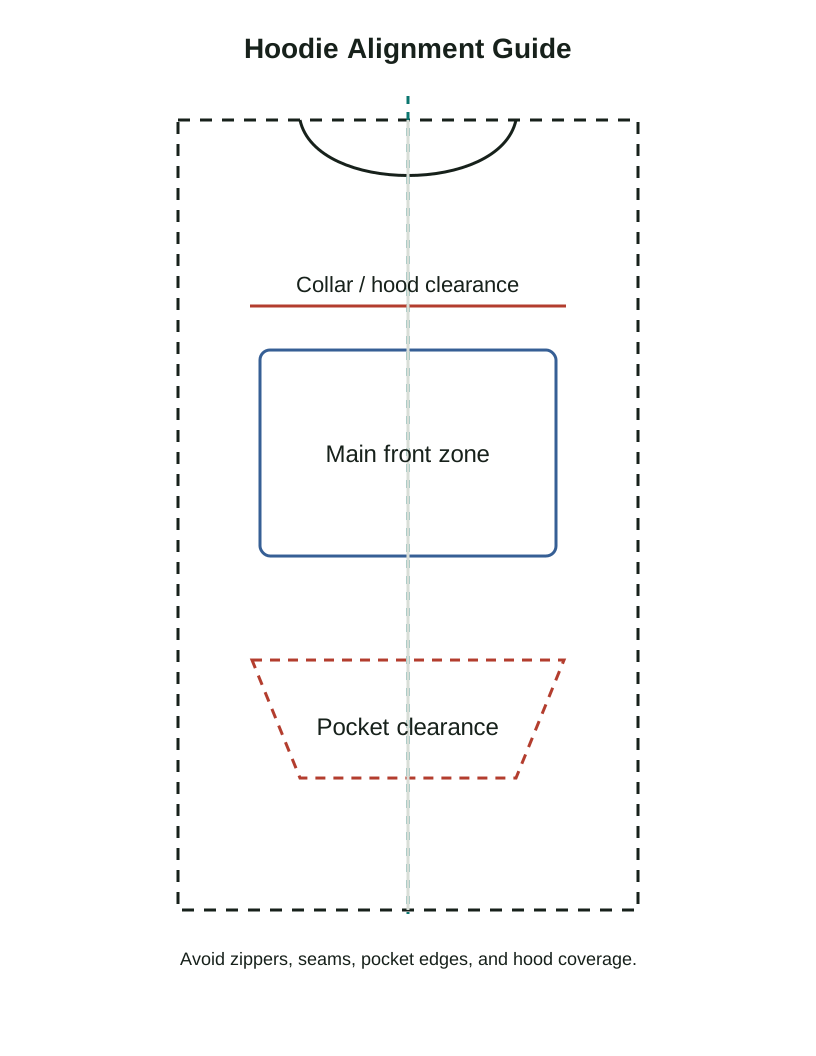
- Pullover hoodie front print planning around kangaroo pockets
- Zip hoodie logo sizing without bridging the zipper
- Back print placement that accounts for hood coverage
Quick placement table
| Area | Starting size | Starting placement | Check before pressing |
|---|---|---|---|
| Pullover front | 9-11.5 in wide | About 3-4 in below collar, above pocket | Confirm pocket top edge before choosing design height |
| Zip hoodie front | 3-5 in wide per side | Use left or right panel, not across zipper | Avoid pressing across zipper teeth or raised seams |
| Back print | 10-12 in wide | About 5-7 in below collar, depending on hood | Fold hood down to see how much print it covers |
| Sleeve print | 2-3.5 in wide or 10-14 in long | Align along sleeve center and away from cuff seam | Sleeve taper can distort long vertical designs |
Assumptions and notes
- Use a pressing pillow or pad when seams and pockets create height differences.
- Zip hoodies need separate left/right panel planning.
- The hood can hide upper-back artwork; check with hood laid naturally.
Common mistakes
- Placing a full-front transfer too low because the pocket was ignored.
- Running a design across the zipper as one transfer.
- Putting a back print under the hood without checking visibility.
Download / print actions
FAQ
Can I press over a hoodie pocket?
It is usually safer to keep the main design above the pocket or use a pad to reduce pressure gaps around pocket seams.
How do I place a back print on a hoodie?
Fold the hood down first, then place the print low enough that the main artwork remains visible when the hoodie is worn.